 Well, we are talking about how to get to root on iOS 7. So I’ll just tell you how you can access it without jailbreak.
iOS 7 Beta Root Access Preparation
Sometimes you wish to see all the root files on the iPhone in order to change some settings. Developers and hackers can get this access and ordinary users are also able to turn on acf2, but only on iOS 7 beta 1 iPhone 4. If you have iPhone 5 / 4S / 3GS you can’t succeed. Mac and Windows computers are ok to use. You should download TinyUmbrella, WinSCP tool, any plist editor, iFunBox and SSH RAMDisk tool from MSFTGuy before we’ll begin.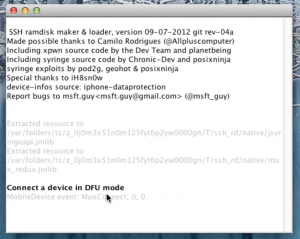
Root iPhone 4 iOS 7 Without Jailbreaking
Follow these steps in order to root your iOS 7 iPhone 4. Step 1. 32bit system users should delete Java 7 and get Java 6 version 35 instead. 64bit system users should get switch from Java 7 32 bit into 64 bit. Step 2. It is necessary to put your smartphone into DFU state here. Step 3. Open WinSCP tool [one of these two programs]. Use port 2022 on your localhost. Connect to it using root as your username and alpine as your passcode. If you like to change root SHSH password you can do it now but save it somewhere to not forget it.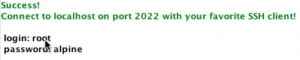 Step 4. You need SSH connection to launch the terminal window, type mount.sh command and click Enter. If this is what you see:
Mounting /dev/disk0s1s1 on /mnt1
Mounting /dev/disk0s1s2 on /mnt2you can continue to the next step. Don’t close SSH client yet. Step 5. Go to /mnt1/etc folder. We need to search for fstab file. Copy it to desktop. The original file on your gadget should be renamed to fstab.old. Step 6. Navigate to desktop and launch the fstab file that you have copied in the previous step [use NotePad, TextEdit or similar programs for this]. Find the first line:
/dev/disk0s1s1 / hfs ro 0 1and rewrite this instead
/dev/disk0s1s1 / hfs rw 0 1Save this file. We should copy it back to your iPhone along with setting the permissions to 0644. Step 7. Go to folder:
/mnt1/System/Library/Lockdownand find Services.plist file that should be copied to desktop just as we did with fstab one. The original file should be renamed to Services.plist.old. Step 8. Launch our desktop copy using any plist editor you have and add all these lines right below com.apple.afc part:
Step 9. Save the file and copy it back to the iPhone 4 with 0644 permissions settings. Step 10. Use SSH client to open another terminal window. You should enter the word halt and click Enter. Your smartphone will be turned off automatically. Your back up will begin.com.apple.afc2 AllowUnactivatedService Label com.apple.afc2 ProgramArguments /usr/libexec/afcd –lockdown -d /
 Step 11. Open TinyUmbrella and point it to your smartphone [the list will appear on the left of this program]. Press on Exit Recovery. The iPhone will restart booting into the newest iOS 7 firmware.
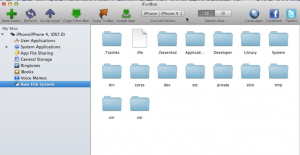 Step 12. Use iFunBox to see your new status. There should be no Jailed next to iPhone 4 and iOS 7. But don’t mess up with your root files as you can do some mistakes and get problems with your device working properly. It is also possible to restore your iPhone using iTunes.
 Recent Blog
Ultimate Guide: How to turn Off Restricted Mode on iPhone?

Automate Apple GSX check result obtaining?
iRemove Unlock iPhone 5S, 5C, 5, SE, 4S/4 Software

MacOS High Sierra Features: Set Up Websites in Safari on Mac
How to Enable iOS 11 Mail Reply Notification on iPhone 7

How to Bypass Apple Watch Passcode Problem
LetsUnlock Services List
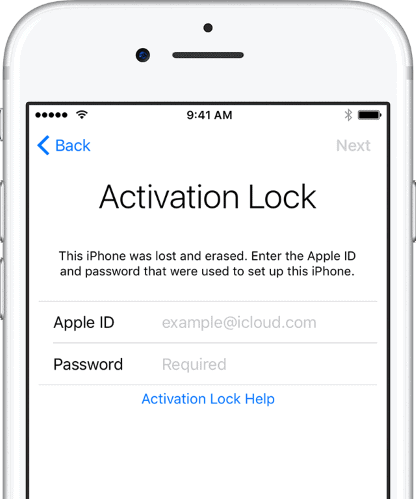
iPhone & iPad Activation Lock Bypass
Use LetsUnlock iCloud Tool to bypass Activation Lock Screen on iPhone and iPad running on iOS version up to 14.6.
Read More
Unlock Passcode Disabled iPhone or iPad
LetsUnlock iCloud Tool is ready to remove Find My and unlock your passcode disable device running on iOS 13.x.x in one click!
Read More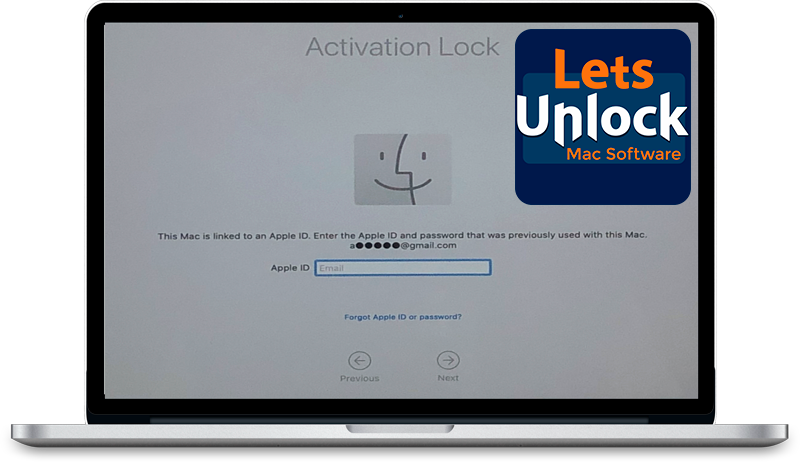
MacOS iCloud Activation Lock Bypass
The LetsUnlock Mac iCloud Activation Lock Bypass Tool will help you to remove Activation Lock on an iCloud locked Mac which is stuck on Activation Lock Screen with no need to enter the correct Apple ID and password.
Read More
Mac EFI Firmware Passcode Bypass
The LetsUnlock EFI Bypass Tool is a one button solution, which you click to start the EFI Unlock process. Bypass EFI with out password! Everything else does the software.
Read More
MacOS iCloud System PIN Bypass
The LetsUnlock MacOS iCloud System PIN Bypass Tool was designed to bypass iCloud PIN lock on macOS without passcode!
Read More