iOS 11 Mail Notifications
Right now you can only download iOS 11 beta if you are a developer or public beta tester. If you are not ready to install the buggy firmware version on your iPad or iPhone you can still learn how you’ll be able to use iPhone email replay notifications on the new operating system. Checking your mailbox every half an hour is not something a lot of us like doing. You can save so much time if you get notified for every email you receive. Is it difficult to enjoy the features on iOS 11 or not?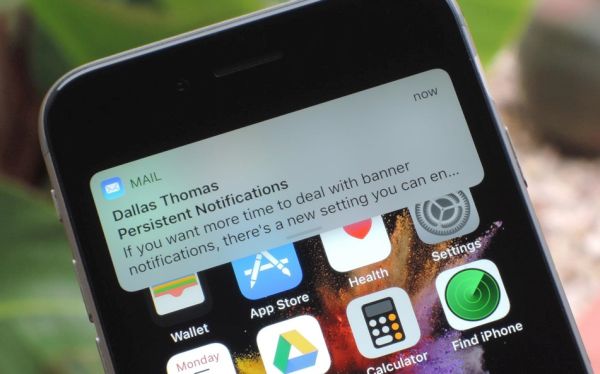
How to Get Email Notifications on iPhone 7
Are you ready to explore iOS 11 features [you can add restrictions to mobile Safari browser]? Let’s see what you should do to adjust the settings: Step 1. Update to iOS 11 which is the most recent firmware version available in summer and fall of 2017. Step 2. Open Mail application either on iPhone 7 or other phone model. Step 3. Compose a new email. Step 4. Sent your email as you regularly do. Step 5. Go to Sent section. Step 6. Select the email you have just sent. Step 7. You’ll find Flag icon at the lower part of the screen. Click on it to enable notifications. Step 8. Choose the option called Notify Me. Step 9. Click on Notify Me again. Users whose email is already sent can still turn on notifications for it. Here is how it happens: Step 1. Go to Mail iOS 11 app. Step 2. Choose Sent folder. Step 3. Select email and click on Flag option at the lower left part of the screen.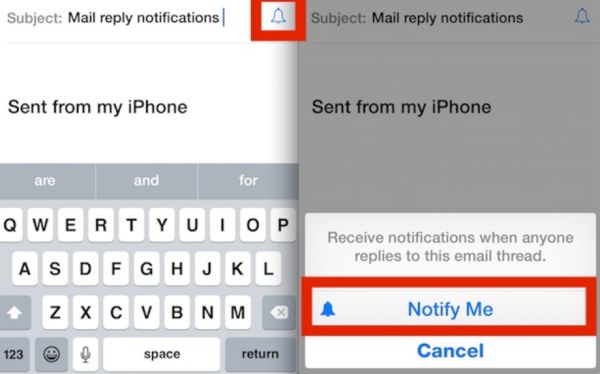 Step 4. Choose Notify Me – confirm by clicking on the same option once again.
Now you’ll get iPhone email reply notification on iOS 11 platform. To complete our guide on how to set up email notifications on iPhone 7, iPad or other iDevices, we should also explain how you can disable this feature.
Step 4. Choose Notify Me – confirm by clicking on the same option once again.
Now you’ll get iPhone email reply notification on iOS 11 platform. To complete our guide on how to set up email notifications on iPhone 7, iPad or other iDevices, we should also explain how you can disable this feature.
How to Disable Email Reply Notification on iOS 11
Step 1. Launch Mail on your iDevice. Step 2. Select Sent folder with emails you have already sent [there are a lot of different email applications to use on iPhone]. Step 3. Choose the email or thread for which notifications are turned on. Do you see the bell next to the letters? Check it out. Step 4. Click on Flag option at the lower part of the screen.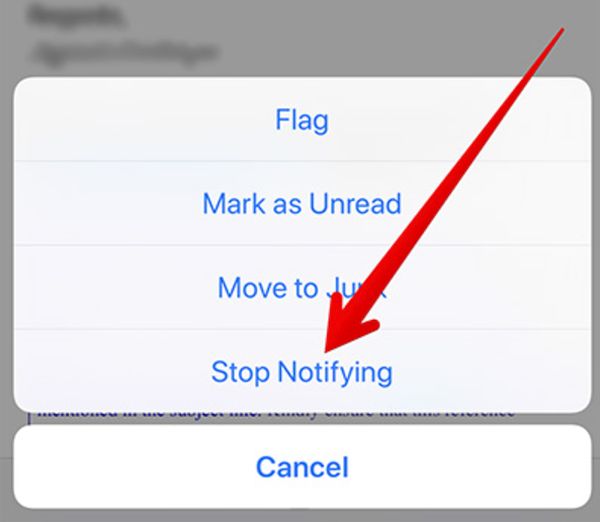 Step 5. Click on the feature that says Stop Notifying.
You see how everything is simple and quick. Enjoy this cool option on your Apple phones and tablet devices.
Step 5. Click on the feature that says Stop Notifying.
You see how everything is simple and quick. Enjoy this cool option on your Apple phones and tablet devices. Recent Blog
Ultimate Guide: How to turn Off Restricted Mode on iPhone?

Automate Apple GSX check result obtaining?
iRemove Unlock iPhone 5S, 5C, 5, SE, 4S/4 Software

MacOS High Sierra Features: Set Up Websites in Safari on Mac
How to Enable iOS 11 Mail Reply Notification on iPhone 7

How to Bypass Apple Watch Passcode Problem
LetsUnlock Services List
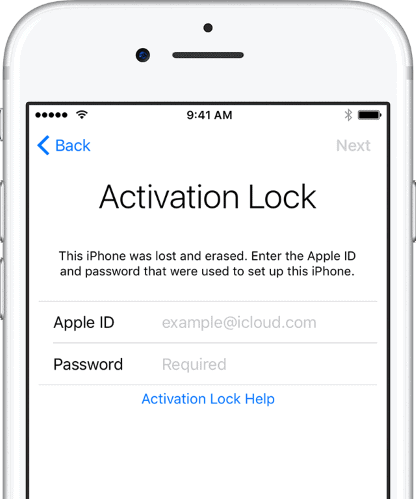
iPhone & iPad Activation Lock Bypass
Use LetsUnlock iCloud Tool to bypass Activation Lock Screen on iPhone and iPad running on iOS version up to 14.6.
Read More
Unlock Passcode Disabled iPhone or iPad
LetsUnlock iCloud Tool is ready to remove Find My and unlock your passcode disable device running on iOS 13.x.x in one click!
Read More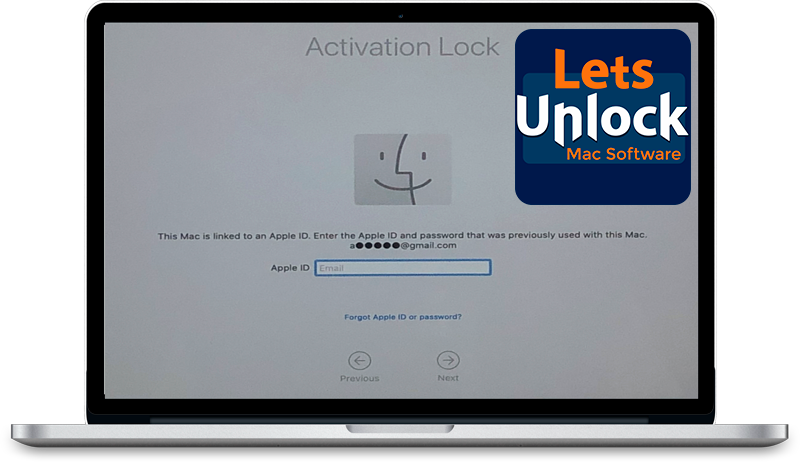
MacOS iCloud Activation Lock Bypass
The LetsUnlock Mac iCloud Activation Lock Bypass Tool will help you to remove Activation Lock on an iCloud locked Mac which is stuck on Activation Lock Screen with no need to enter the correct Apple ID and password.
Read More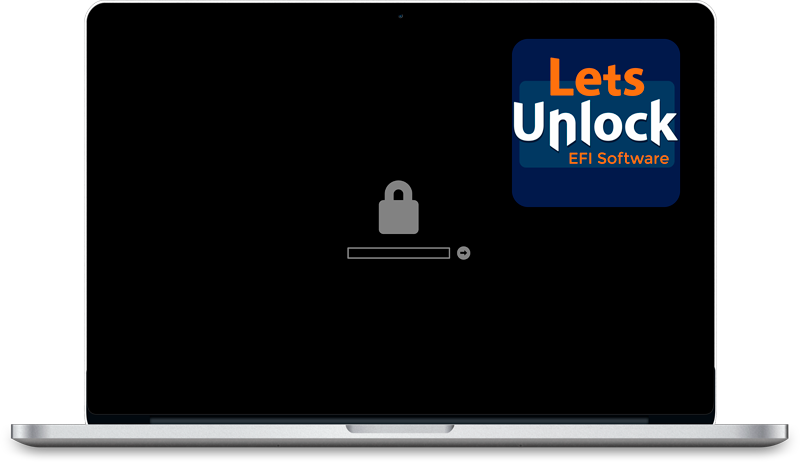
Mac EFI Firmware Passcode Bypass
The LetsUnlock EFI Bypass Tool is a one button solution, which you click to start the EFI Unlock process. Bypass EFI with out password! Everything else does the software.
Read More
MacOS iCloud System PIN Bypass
The LetsUnlock MacOS iCloud System PIN Bypass Tool was designed to bypass iCloud PIN lock on macOS without passcode!
Read More